Your roof is your home’s first line of defense, and replacing it brings incredible peace of mind. But the process of getting there can feel a bit chaotic. The noise, the crew, the dumpster in the driveway—it’s a lot to manage. Knowing exactly what’s coming makes all the difference. This guide demystifies the entire new roof installation process, from the initial inspection to the final walk-through. We’ll explain each step so you can feel prepared and in control. When you understand the workflow, the temporary disruption feels much more manageable, and you can focus on the final result: a secure, beautiful new roof.
Key Takeaways
- Understand the installation workflow: A professional roof replacement is an efficient process that is often completed in just a few days. Knowing the steps, from preparing your property to the final cleanup, helps you manage the project with confidence.
- Prioritize the right contractor and materials: While materials like asphalt or metal impact your budget and your home’s style, choosing a licensed, insured, and reputable contractor is the most critical factor for a quality, long-lasting roof.
- Confirm permits and perform regular maintenance: A professional contractor will handle all necessary permits and inspections for a code-compliant job. After the work is done, protect your investment by doing simple visual checks to catch small issues early.
What Happens During a Roof Installation?
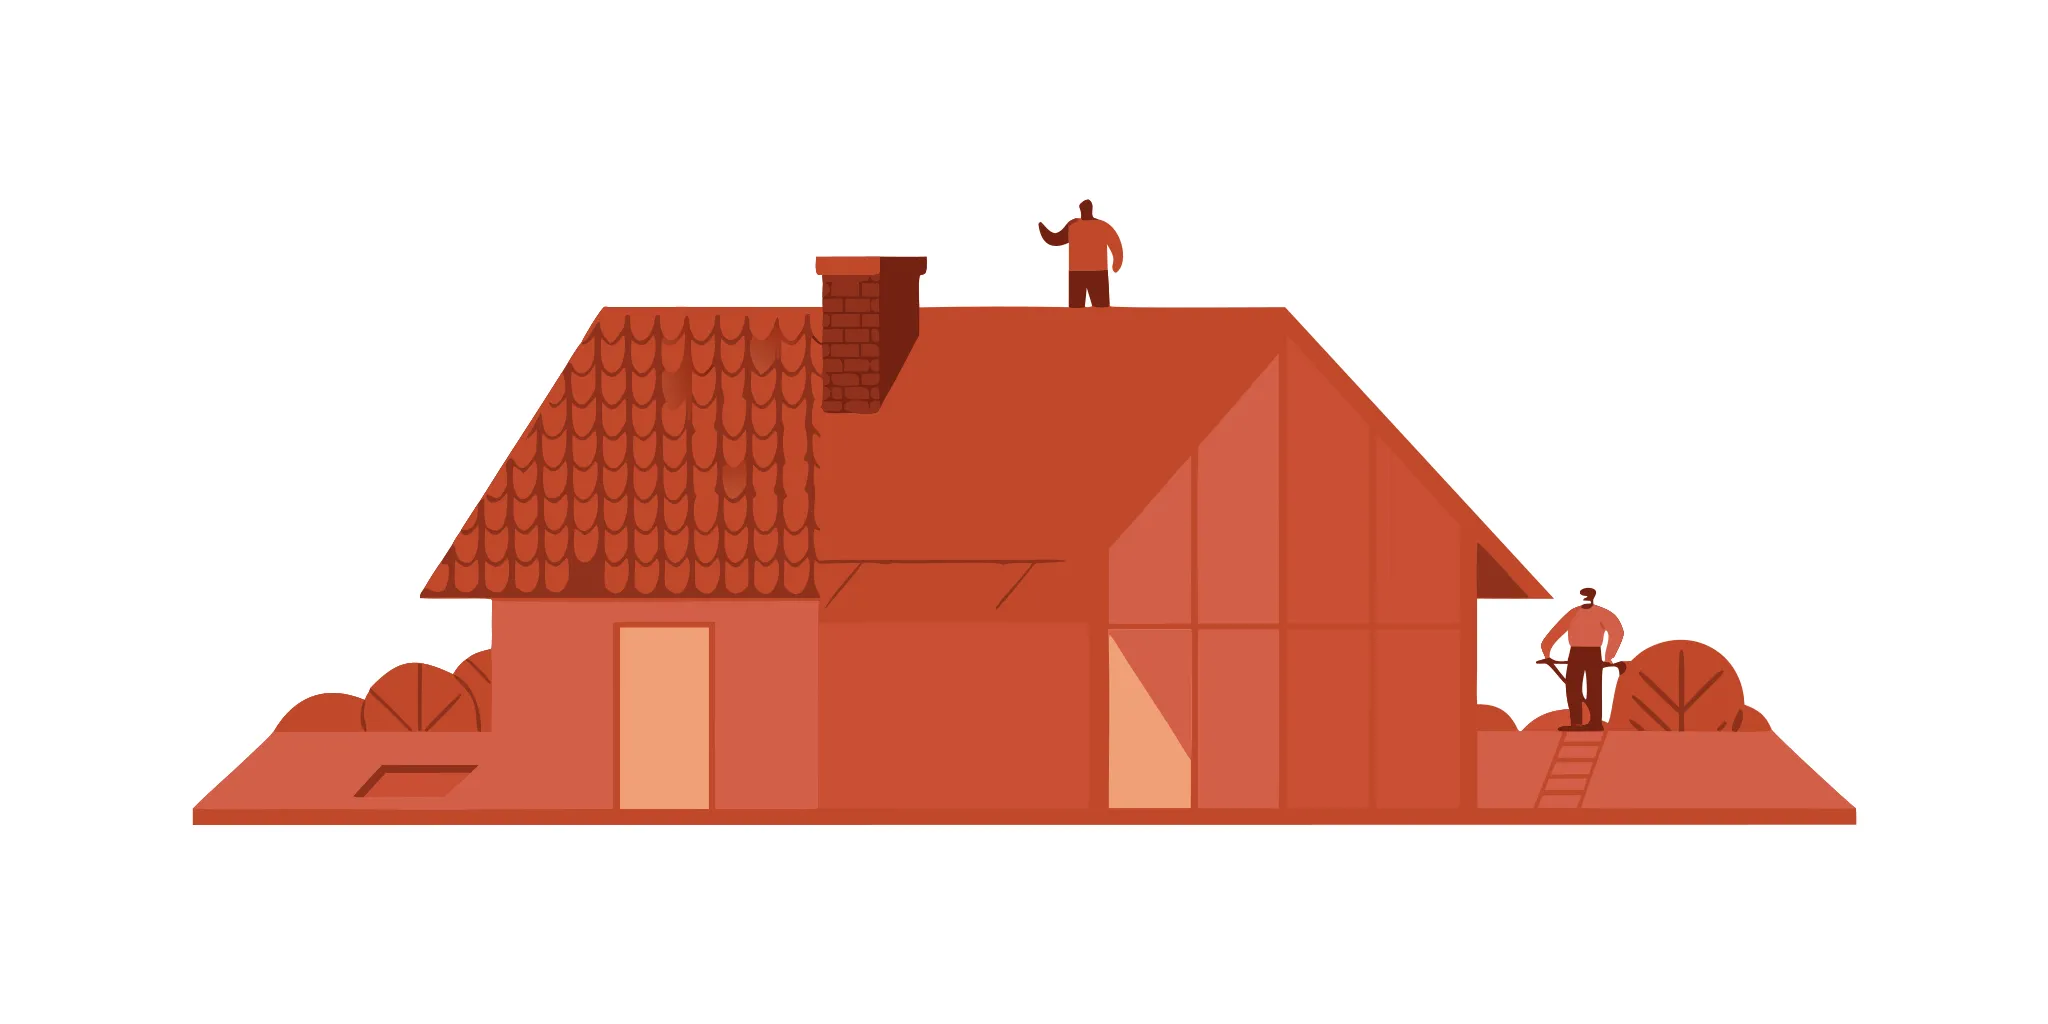
Getting a new roof is a big project, but it doesn’t have to be a stressful one. When you know what to expect, the entire process feels much more manageable. A professional roofing installation is a well-organized operation that follows a clear, step-by-step plan to protect your home and give you a beautiful, durable result. It’s more than just laying down new shingles; it’s a systematic process that ensures the longevity and safety of your entire home, from the wooden deck below to the final shingle on top.
From the initial inspection to the final cleanup, every stage is designed for efficiency and quality. The crew will prepare your property, remove the old materials, inspect and repair the underlying structure, install the new roof, and leave your yard looking just as it did before they arrived. Understanding this workflow helps you plan for the noise, activity, and incredible transformation ahead. Knowing what happens each day can make all the difference in your experience. Let’s walk through the five main steps of a typical roof replacement so you can feel confident and prepared from start to finish.
Step 1: Inspection and Material Delivery
Before any work begins, a roofing expert will perform a detailed inspection of your current roof and attic. This allows them to assess its condition, identify any potential issues, and provide you with an accurate, comprehensive estimate. Once you give the green light, the team will order all the necessary materials.
You can expect a delivery of shingles, underlayment, and other supplies a few days before the installation date. The materials will likely be placed in your driveway or another designated spot on your property. On the morning the project starts, the crew will arrive with their equipment, including a dumpster for the old roofing debris.
Step 2: Tearing Off the Old Roof
With your property prepped and protected, the first major task is removing the old roof. The crew typically starts at the peak and works their way down, using specialized tools like roofing shovels and pry bars to strip away the old shingles and underlayment. This process exposes the wooden roof deck underneath.
This step can be noisy and a bit messy, but a professional team works efficiently to contain the debris. All the old materials are tossed directly into the on-site dumpster, keeping your yard as clean as possible throughout the tear-off phase. Removing the old layers is essential for inspecting the deck and ensuring your new roof has a solid foundation.
Step 3: Repairing the Deck and Adding Underlayment
Once the old roof is completely removed, the crew will carefully inspect the exposed wood deck for any signs of damage, such as soft spots, rot, or water stains. If any sections are compromised, they will be repaired or replaced to create a sturdy, reliable base for your new shingles. This is a critical step that prevents future problems.
Next, a protective layer called underlayment is installed over the entire roof deck. This material acts as a secondary water barrier, shielding your home from wind-driven rain and ice dams. It’s a crucial component that adds an extra layer of defense and contributes to the long-term health of your roofing system.
Step 4: Installing New Shingles and Vents
Now for the transformation. The team begins installing your new shingles, starting with a special row at the eaves and working their way up the roof. Each shingle is carefully placed and secured with roofing nails according to the manufacturer’s specifications to ensure maximum durability and wind resistance.
During this stage, the crew will also install or replace flashing around chimneys, skylights, and valleys to seal these vulnerable areas from water intrusion. They will also address ventilation, installing new vents to allow for proper airflow in your attic. This helps regulate temperature and moisture, protecting your roof structure and even helping with energy efficiency.
Step 5: Final Cleanup and Walk-Through
After the last shingle is in place, the job isn’t quite finished. A thorough cleanup is essential. The crew will clear all debris from your roof, gutters, and property. They’ll use magnetic rollers to sweep the lawn, driveway, and garden beds for any stray nails or metal scraps, leaving your yard safe and spotless.
Finally, the project manager will do a final walk-through with you to inspect the finished work and ensure you are completely satisfied. This is your opportunity to ask any remaining questions and admire your beautiful new roof. They’ll also ensure your gutters are clear and ready to do their job.
How to Choose the Right Roofing Material
Choosing a new roof is a big decision, and the material you pick plays a huge role in your home’s appearance, protection, and long-term value. With so many options available, it’s easy to feel a bit lost. The best approach is to think about four key factors: your budget, the architectural style of your home, your local climate, and how long you want the roof to last.
From the classic look of asphalt shingles to the sleek durability of metal, each material has its own set of benefits. Understanding these differences will help you find the perfect match for your home and your wallet. Let’s walk through some of the most popular choices to help you make a confident decision.
Comparing Asphalt Shingles and Metal
Asphalt shingles are the most common roofing material for a reason: they are affordable and come in a wide variety of colors and styles. They’re a reliable, cost-effective choice, especially if you’re working with a tight budget. However, their lifespan is shorter than other materials, typically lasting around 20 to 30 years.
Metal roofs, on the other hand, are a fantastic long-term investment. While the upfront cost is higher, a properly installed metal roof can last 50 years or more, sometimes close to a century. They are incredibly durable, energy-efficient, and can handle heavy snow and high winds with ease. Plus, modern metal roofing comes in many styles that can mimic the look of traditional shingles, slate, or tile.
Exploring Tile and Slate Options
If you’re looking for unparalleled longevity and a timeless, elegant look, tile and slate are top-tier options. These materials are known for their exceptional durability and can last for over 100 years with proper maintenance. Concrete, clay, or slate tiles offer a classic aesthetic that can significantly enhance your home’s curb appeal, making them a popular choice for Mediterranean, Spanish, or historic-style homes.
Because they are so heavy, it’s important to have a professional confirm that your home’s structure can support the weight before installation. While tile and slate are among the most expensive roofing materials, their incredible lifespan and classic beauty make them a worthwhile investment for many homeowners who are planning to stay in their homes for the long haul.
Matching Your Roof to Your Home’s Style and Climate
Your roof is one of your home’s most prominent features, so you want it to complement the overall design. A sleek, dark metal roof might look perfect on a modern farmhouse, while clay tiles are the natural choice for a Spanish-style villa. Think about your home’s architectural style and choose a material and color that fits its character.
It’s also crucial to consider New Jersey’s climate. We get hot summers, cold winters, and plenty of rain and snow. Some materials handle these conditions better than others. For example, metal roofs are great at shedding snow, and light-colored shingles can help reflect summer heat. An experienced roofing contractor can provide expert advice on which materials perform best in our specific region.
Balancing Your Budget with a Roof’s Lifespan
Ultimately, choosing the right roofing material comes down to balancing your immediate budget with your long-term goals. Asphalt shingles are a great option if you need an affordable, reliable roof now. They get the job done without a massive upfront cost.
However, if you can invest more initially, materials like metal, tile, or slate offer greater long-term value. You’ll pay more at the start, but you’ll get a roof that lasts two or three times as long, requires less maintenance, and can even improve your home’s energy efficiency. Think about how long you plan to live in your home and weigh the pros and cons of each material to find the right balance for your needs.
How to Prepare Your Home for a New Roof
Getting a new roof is exciting, but the installation process can be a bit disruptive. A little preparation can make a huge difference, ensuring the project goes smoothly for you, your family, and the installation crew. Taking a few simple steps before the team arrives helps protect your property, keep everyone safe, and set the stage for an efficient installation. Think of it as setting your roofing team up for success, which ultimately leads to a better experience and a beautiful final result for your home.
Protect Your Yard and Landscaping
Your home’s exterior is more than just the house itself; it includes your carefully tended garden, lawn, and patio. During a roof replacement, debris like old shingles and nails will be coming down. Before the crew arrives, take a walk around your property and move any potted plants, patio furniture, grills, and garden decorations to a safe location, like a garage or shed. For delicate plants or flower beds close to the house, you can cover them with tarps. It’s also a great idea to point out any specific landscape features, like an irrigation system, to your roofing contractor so they can work around them carefully.
Keep Kids and Pets Safe
A roof installation site is a construction zone, and safety is the top priority. The area around your home will be busy with workers, tools, and falling debris. For their safety, it’s essential to keep children and pets away from the work area. The best plan is to keep them inside and away from the action. If possible, you might even consider arranging for them to spend the day with a friend or family member. This not only prevents accidents but also helps the crew work more efficiently without worrying about anyone getting too close to the site.
Prepare for Noise and Vibrations
There’s no way around it: installing a new roof is loud. You’ll hear constant hammering, scraping, and the sounds of power tools throughout the day. The work can also cause vibrations that you’ll feel inside the house. We recommend taking down any pictures, mirrors, or delicate items from your walls and shelves to prevent them from falling. While you can certainly stay home during the installation, you might find it difficult to work or relax. It’s also a thoughtful gesture to give your immediate neighbors a heads-up about the upcoming work and potential noise.
Clear a Path for Your Contractors
Your roofing crew needs clear and easy access to your home to get the job done right. Before they arrive, please move your cars out of the driveway and park them on the street. This gives them space for their vehicles, equipment, and the dumpster for old materials. You should also clear a path around the entire perimeter of your house. Make sure any toys, bikes, hoses, or lawn equipment are moved out of the way. A clear workspace allows the team to move safely and efficiently, which helps them complete your new roof and gutter installation on schedule.
What Factors Into the Cost of a New Roof?
Figuring out the budget for a new roof can feel like a puzzle, but it becomes much clearer when you understand the pieces that make up the final price. A quote for a new roof isn’t just a single number; it’s a combination of materials, labor, and the unique characteristics of your home. Knowing what influences the cost will help you compare estimates and make a confident decision for this important home investment. From the shingles you choose to the slope of your roof, several key factors come into play. Let’s walk through the main components so you know exactly what to expect.
Your Choice of Roofing Material
The material you select is one of the biggest drivers of the total cost. Think of it as the foundation of your roofing budget. Asphalt shingles are a very popular choice for New Jersey homeowners because they offer a great balance of durability and affordability. However, there are many other options to consider. Materials like metal, tile, or slate have different price points and come with their own benefits, such as longer lifespans or specific aesthetic styles. When making your choice, it’s helpful to weigh the upfront cost against long-term value and how well the material suits your home and local climate.
The Size and Shape of Your Roof
It makes sense that a larger roof requires more materials and more time to install, which increases the cost. But it’s not just about square footage. The complexity of your roof’s design also plays a significant role. A simple, gently sloped roof is more straightforward to work on than one with steep pitches, multiple levels, dormers, or skylights. These features require more precise cutting, detailed work, and extra safety precautions from the crew, all of which add to the labor hours and the final price tag.
Labor and Local Market Rates
Labor is a major component of any roofing project, typically accounting for 40% to 60% of the total cost. This covers the skilled team that will safely remove your old roof and install the new one. Labor rates can vary based on your location and the experience of the contractor. A highly skilled, insured, and reputable team might have higher labor costs, but that investment ensures the job is done correctly and safely. The complexity of the job also affects labor; a steep or intricate roof requires more time and expertise, which will be reflected in the quote.
Permits and Potential Repairs
A few other costs can pop up during a roofing project. First, you’ll almost always need a municipal permit to ensure the work meets local building codes, and this comes with a fee. More importantly, there’s always a chance of uncovering hidden issues once the old shingles are torn off. If the crew finds soft spots or water damage on the underlying roof deck, those areas will need to be repaired before the new roof can be installed. While it adds to the cost, fixing this underlying damage is crucial for the long-term health and stability of your new roof.
One of the first questions every homeowner asks is, “How long will my house be a construction zone?” It’s a fair question. You want to plan your life around the noise and activity. While every project is unique, a new roof installation is a surprisingly efficient process. Most residential roof replacements are completed in just a few days.
Of course, several factors can influence this timeline. The size of your home, the materials you choose, and even the weather can play a role. Let’s break down what you can typically expect and what might cause the project to take a little longer.
Understanding the Typical Timeline
For most average-sized homes, a professional roofing team can complete a full replacement in about one to three days. If you have a smaller, simpler roof and are using common materials like asphalt shingles, the job can often be finished in a single day. Larger homes with more complex rooflines might stretch into the two-to-three-day range.
This timeline generally covers everything from tearing off the old materials to installing the new shingles and cleaning up the site. Your contractor will give you a more precise estimate based on your specific home, but it’s helpful to know that you likely won’t be dealing with a weeks-long project.
What Can Cause Delays?
While contractors aim to stick to their schedule, a few things can extend the timeline. The biggest variable is the condition of the wood decking underneath your old shingles. If the crew discovers significant rot or damage after the tear-off, they’ll need to repair it before proceeding. This is crucial for the long-term health of your new roof.
Weather is another major factor. For safety and quality reasons, roofers can’t work in the rain or high winds. A few bad weather days can pause the project. Other things that can add time include complex roof designs with steep pitches, multiple chimneys that need resurfacing, or having to remove several layers of old shingles from a previous installation.
How to Find a Reputable Roofing Contractor
Choosing the right contractor is just as important as choosing the right shingles. A new roof is a major investment in your home’s safety and value, so you want to partner with a team you can trust. The best way to start is by creating a shortlist of two to five local contractors. From there, you can meet with your top two or three choices to find the perfect fit for your project. A truly reputable roofing contractor will be transparent, experienced, and ready to answer all your questions. Taking the time to vet your options thoroughly will give you peace of mind and ensure your new roof is built to last. Here are the key steps to follow when making your decision.
Check for Licensing and Insurance
Before you even think about estimates, your first step is to confirm that any potential contractor is properly licensed and insured in New Jersey. This is non-negotiable. A valid license proves they meet state requirements, while insurance protects you from liability. General liability insurance covers any damage to your property during the project, and workers’ compensation covers any injuries that might happen on-site. Without this coverage, you could be held financially responsible. You can verify a contractor’s license through the New Jersey Division of Consumer Affairs. Don’t just take their word for it; do your own due diligence to protect your home and your finances.
Read Reviews and Ask for References
A contractor’s reputation is one of the best indicators of their quality. Start by reading online reviews, but don’t stop there. A company with a proven track record should be happy to provide you with a list of client references and completed projects. Make sure to call a few of these past clients and ask if they were satisfied with the work, the communication, and the overall experience. Getting references is especially important if you’re considering a newer business. Asking for recent, local projects also gives you a chance to drive by and see their workmanship for yourself.
Get Detailed, Written Estimates
Once you’ve narrowed down your list to a few qualified contractors, it’s time to request written estimates. Never rely on a verbal quote. A professional estimate should be a detailed document that clearly outlines the full scope of the project. It needs to include a breakdown of the specific materials to be used, labor costs, the payment schedule, and an estimated timeline for completion. Getting a few different estimates will help you compare costs, but remember that the lowest bid isn’t always the best choice. A suspiciously low price could signal subpar materials or inexperienced labor, which will only cost you more in the long run.
Understand the Warranty
A new roof typically comes with two types of warranties: a manufacturer’s warranty that covers the materials themselves and a workmanship warranty from your contractor that covers the installation. A reliable contractor will always stand behind their work with a solid workmanship warranty. Before signing a contract, make sure you understand the terms of both warranties. Ask how long the coverage lasts, what specific issues are covered, and if there are any actions that could void it. Getting these details in writing is crucial for protecting your investment for years to come.
What Permits and Inspections Are Required?
Figuring out permits and inspections can feel like a chore, but it’s a crucial part of any major home improvement project, including a new roof. These regulations aren’t just about paperwork; they exist to ensure your new roof is installed safely and correctly, protecting your home and your family for years to come. A professional contractor will handle the entire process for you, from filing the initial application to scheduling the final sign-off. This ensures every part of your new roof installation meets state and local standards, giving you total peace of mind. Think of it as a built-in quality check that confirms your investment is sound and your home is secure.
Understanding Local Building Codes
Every municipality in New Jersey has its own set of building codes that dictate how a roof must be installed. These rules cover everything from the types of materials you can use to how shingles are fastened and what kind of ventilation is required. Your contractor’s job is to know these codes inside and out. They will secure all the necessary permits before any work begins, making sure the project plan is fully compliant with local requirements. This step is essential for avoiding potential fines or work-stoppage orders. By working with an experienced local team, you can be confident that your project will proceed smoothly and adhere to all safety and structural standards from day one.
Scheduling Your Inspections
Once the permit is issued, your project will likely require one or more inspections at key stages. An inspector will visit your home to verify that the work meets the approved plans and building codes. You almost always need a permit for a full roof replacement, and this will have an associated fee that should be outlined in your contractor’s estimate. It’s also important to be aware of any specific rules from your Homeowners Association (HOA). A reputable contractor will coordinate these inspections, ensuring they happen at the right time to keep your project on schedule. You can learn more about New Jersey’s specific permitting process to get a better sense of the requirements.
How to Maintain Your New Roof
A new roof is a significant investment in your home’s safety and value, and you’ll want to protect it. With a little proactive care, you can extend its lifespan and prevent small issues from turning into costly repairs. Regular maintenance ensures your roofing continues to perform its best, protecting your family and your property from the elements for years to come. Think of it as a simple check-up to keep your home’s most important shield in top condition.
Most of the work involves simple observation. You don’t need to be a roofing expert to spot the early signs of trouble. By pairing your own visual inspections with occasional professional help, you can create a maintenance plan that keeps your new roof looking and functioning like new. It’s all about being attentive and knowing who to call when you spot something that doesn’t look right.
Your first line of defense is a regular visual inspection that you can do yourself, no ladder required. It’s a good practice to inspect your roof yearly, especially after a major storm. From the ground, use a pair of binoculars to check for signs of damage like curling, cracking, or missing shingles. Look for any rust spots on flashing or dark streaks, which could indicate algae growth.
Inside your home, head up to the attic and look for signs of leaks, like water stains on the wood, damp insulation, or daylight coming through the roof boards. Also, make sure your gutters are clean and clear of debris. Clogged gutters can cause water to back up and seep under your new shingles, leading to rot. Catching these things early is the key to avoiding bigger problems.
Know When to Call a Pro for Maintenance
While self-inspections are helpful, some issues require a professional eye. If you spot anything concerning or just want peace of mind, it’s time to call in an expert. A professional can safely get on the roof to assess things up close. They can spot subtle signs of trouble you might miss, and more importantly, they can identify hidden damage. If there’s hidden damage like rotting wood, repairs could add $1,000 to $5,000 or more if left unaddressed.
Even a new roof will eventually age. While you won’t have to worry for a long time, it’s good to know that if your roof is old (for example, a 20-year-old asphalt shingle roof), it might be time to plan for a replacement. For your new roof, call a professional if you notice widespread granule loss, any sagging, or damage that seems too complex for a simple fix. A professional inspection can confirm your roof is in great shape or catch a minor issue before it escalates.
Related Articles
Frequently Asked Questions
How long will my new roof actually last? The lifespan of your new roof really depends on the material you choose. An asphalt shingle roof, which is the most common choice, typically lasts about 20 to 30 years. If you invest in a premium material like metal or slate, you could get 50 years or even a century of protection. Keep in mind that proper installation and regular maintenance are just as important as the material itself for ensuring your roof reaches its maximum lifespan.
Can I stay home while my new roof is being installed? You absolutely can stay home during the installation, but it’s good to know what to expect. The process is very loud, with constant hammering and scraping that can cause vibrations throughout the house. If you work from home or have young children or pets, you might find it more comfortable to spend the day elsewhere. The decision is entirely up to you and what works best for your family’s routine.
What happens if the crew finds unexpected damage under my old roof? This is a common concern, and it’s exactly why a full tear-off of the old roof is so important. If the team uncovers any issues like soft spots or water-damaged wood on the deck, they will stop work immediately. The project manager will show you the problem, explain the necessary repairs, and provide a clear cost for the extra work. Nothing will be done without your full understanding and approval.
Will a new roof help lower my energy bills? Yes, a new roof can definitely contribute to better energy efficiency. This happens in two main ways. First, modern roofing materials often have better reflective properties, which helps keep your attic cooler in the summer. Second, a professional installation ensures your attic has proper ventilation. This allows hot air to escape, reducing the strain on your air conditioning system and helping to regulate your home’s temperature all year.
How do I know if I need a full roof replacement or just a repair? A few missing shingles or a small, isolated leak can often be handled with a simple repair. However, if you’re seeing widespread issues like curling or cracking shingles across your roof, significant loss of the sandy granules, or if your asphalt roof is over 20 years old, it’s likely time for a full replacement. The best way to know for sure is to have a professional perform a thorough inspection.