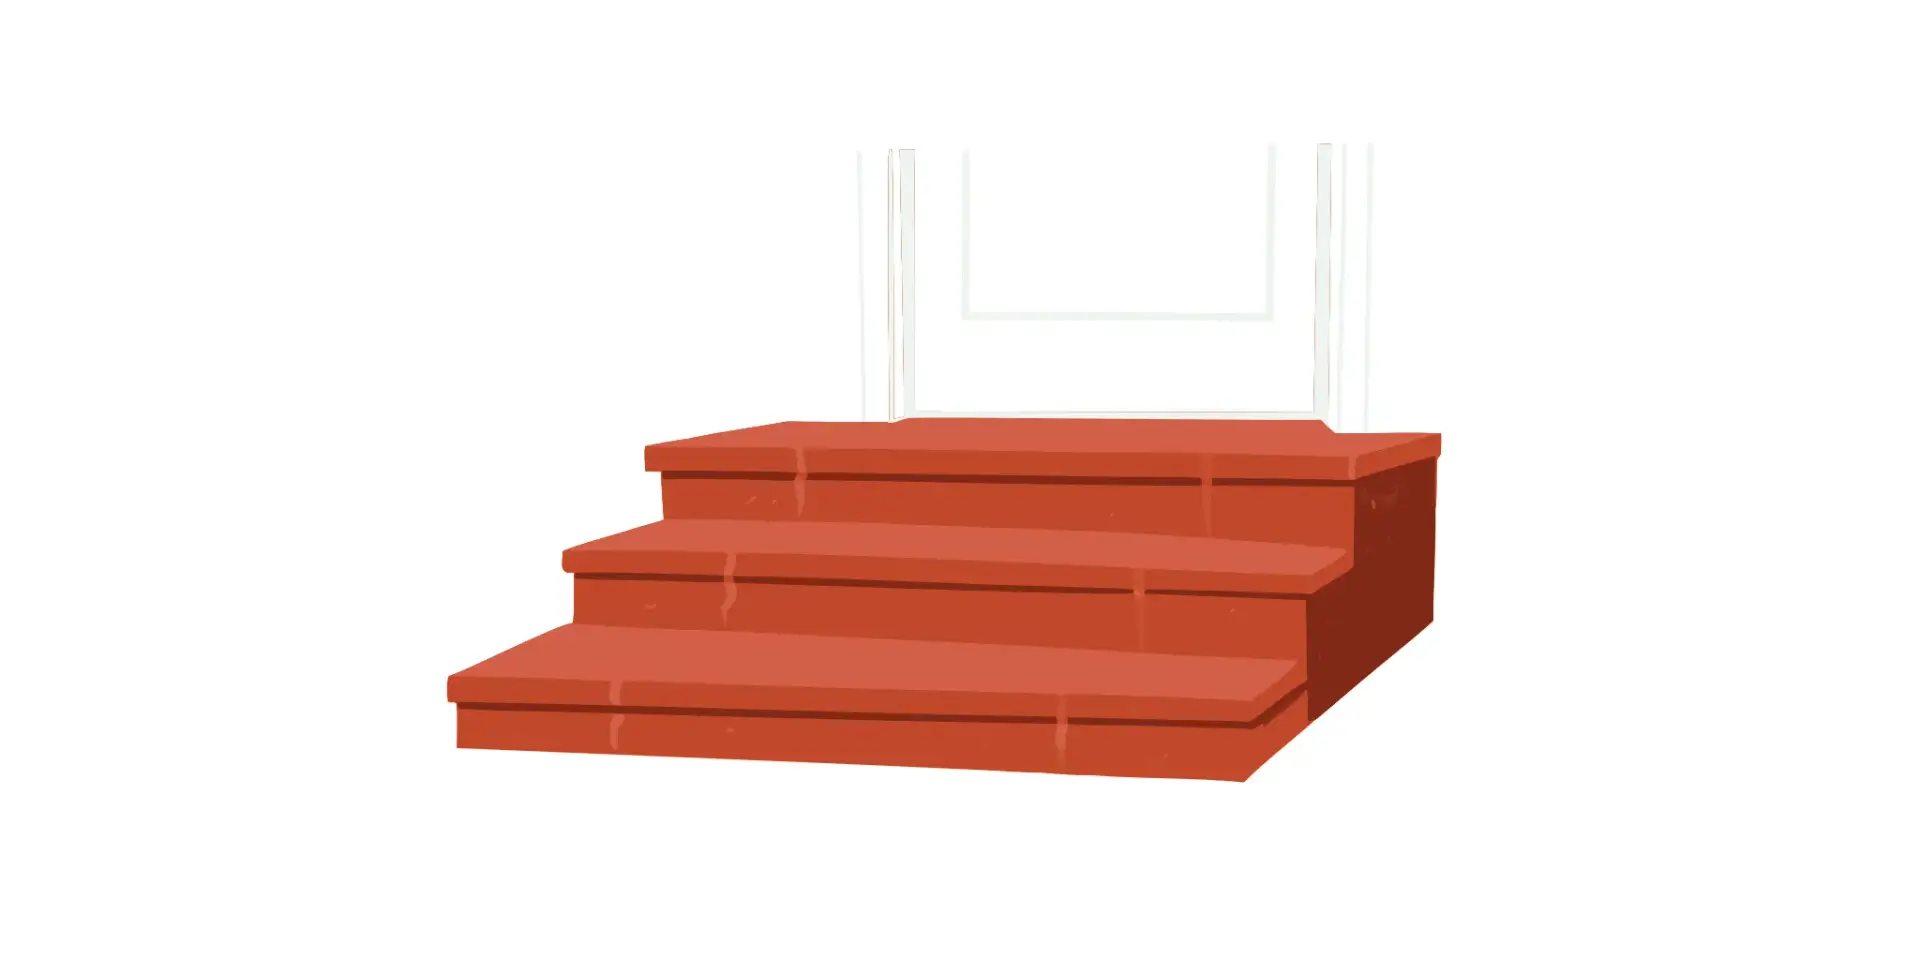
Your porch is the first thing guests see, and a cracked, stained surface can drag down your home’s entire curb appeal. Before you start getting quotes for a full demolition and replacement, there’s a much smarter solution to consider. Resurfacing is a powerful technique that gives you the look and feel of brand-new concrete without the massive expense and disruption of a total tear-out. It’s more than just a patch job; it’s a complete aesthetic overhaul. This guide will walk you through everything you need to know about resurfacing concrete porch and steps, from assessing the damage to applying the final, protective coat for a beautiful, long-lasting finish.
Key Takeaways
- Assess your concrete’s health before you begin: Resurfacing is a cost-effective solution for surface-level issues like small cracks and discoloration. For major structural problems, such as deep cracks or crumbling, a full replacement is the safer, more permanent fix.
- Proper preparation is non-negotiable for a lasting finish: The new resurfacing material needs a clean, solid base to bond correctly. Skipping steps like stripping old paint or power washing will almost certainly lead to peeling and cracking down the road.
- Timing and technique are everything during application: The resurfacing compound sets very quickly, so you need to work efficiently to get a smooth, even coat. If you’re unsure about handling the material or assessing the initial damage, calling a professional ensures the job is done right the first time.
Is Concrete Resurfacing Right for Your Porch and Steps?
If your concrete porch and steps are looking a little tired, you might be thinking about a complete tear-out and replacement. But before you bring in the jackhammers, let’s talk about resurfacing. It’s a fantastic way to get a fresh, new look without the cost and hassle of a full demolition. Deciding if it’s the right move for your home comes down to understanding the benefits, the cost, and the current condition of your concrete.
The Benefits of a Fresh Surface
The biggest win with concrete resurfacing is the instant transformation. You can make an old, worn-out porch look brand new, which does wonders for your home’s curb appeal. Beyond aesthetics, a proper resurfacing job protects the underlying concrete from further wear and tear, adding several years to your porch’s life. It’s a practical and beautiful solution that covers up minor imperfections like small cracks, stains, and discoloration. A professional resurfacing gives you a durable, clean slate that can even be customized with different colors and textures for a look that’s uniquely yours. It’s all the impact of a new porch with a fraction of the disruption.
Resurfacing vs. Replacement: A Cost Breakdown
When it comes to your budget, resurfacing is almost always the more economical choice. Concrete resurfacing typically costs between $4 and $25 per square foot, depending on the complexity and finish you choose. In contrast, tearing out and replacing concrete is a much bigger project involving demolition, debris removal, and pouring a new slab, which significantly increases labor and material costs. In fact, it’s estimated that in about 90% of cases, it’s cheaper to resurface your concrete than to start from scratch. As long as the concrete underneath is structurally sound, you can save a lot of money and still get a beautiful, long-lasting result for your home’s exterior.
When to Resurface and When to Replace
So, how do you know if your porch is a good candidate? Resurfacing works best if your concrete steps and porch are still mostly solid, even with some surface-level cracks or chips. It’s designed to fix cosmetic issues, not major structural problems. If you’re dealing with large, deep cracks, severe crumbling, or uneven surfaces caused by ground shifting, replacement might be your only option. While quick patch kits exist, these temporary fixes often fail within a year or two. A professional resurfacing job is a permanent solution. If you’re unsure about the extent of the damage, it’s always a good idea to have an expert take a look.
How to Prep Your Concrete for a Flawless Finish
Think of your concrete porch as a canvas. Before you can create a masterpiece, you have to prepare the surface. Proper prep work is the single most important factor in achieving a durable, professional-looking finish that lasts for years. Skipping these steps can lead to peeling, cracking, and a lot of wasted effort. Taking the time to get your concrete ready ensures the new surface will bond correctly and stand up to foot traffic and weather.
Strip Away Old Paint and Coatings
First things first, you need a completely clean slate. Any old paint, sealant, or coating has to go. If you apply a new resurfacer over old, flaky paint, it simply won’t stick properly, and you’ll see peeling within a year. The new material needs to bond directly with the concrete itself. You can use a chemical paint stripper designed for concrete or get to work with a scraper and wire brush. It’s a bit of a workout, but this step is non-negotiable for a successful project. A perfectly prepped surface is the foundation for all successful resurfacing jobs.
Power Wash for a Clean Slate
Once the old coatings are gone, it’s time for a deep clean. A power washer is your best friend here, as it will blast away years of built-up dirt, algae, mildew, and any leftover chemical residue. Work your way across the entire porch and all the steps, making sure to get into every corner. This not only cleans the concrete but also slightly roughens the surface, which gives the new resurfacing material something to grip onto. After you’re done, you have to let the concrete dry completely. This can take a full day or more, depending on the weather, so plan accordingly.
Repair Cracks and Assess the Damage
With the surface clean, you can get a clear look at its true condition. Carefully inspect for any cracks, chips, or holes. Most resurfacing compounds are only meant to be applied in thin layers, typically no more than half an inch thick. If you have deeper damage or significant cracks, you’ll need to fill them with a dedicated concrete patching product first. For extensive cracking or crumbling, it might be a sign of a bigger issue. If you see widespread damage, it may be time to consult with a professional about masonry repair before proceeding.
Prime the Surface for a Strong Bond
This final prep step is simple but critical. Right before you apply the resurfacing mix, you need to prime the concrete. For most products, this just means lightly misting the surface with water from a garden hose or a spray bottle. Why? Dry, porous concrete will suck the water out of the new mixture too quickly, preventing it from curing properly and creating a weak bond. The goal is a surface that is visibly damp but has no standing puddles. This ensures the resurfacer cures evenly and forms a strong, lasting connection to your old concrete porch.
Your Concrete Resurfacing Toolkit: Materials and Tools
Before you can give your porch that fresh new look, you need to gather your supplies. Having the right tools and materials on hand makes all the difference between a frustrating weekend and a project you can be proud of. Think of it like cooking a great meal; your ingredients and kitchen gadgets matter. Getting everything organized before you start mixing will help your project run smoothly from the first pour to the final sweep. Let’s walk through exactly what you’ll need to get the job done right.
Choosing the Right Resurfacer and Mixing Supplies
Picking the right concrete resurfacer is your first big decision. These products are designed for thin applications, usually up to half an inch. If you have deeper cracks or missing chunks of concrete, you’ll need to patch those areas first with a separate repair mortar. When you’re ready to mix, follow the manufacturer’s instructions to the letter. A common ratio is about 2.5 quarts of water for a 25-pound bag. If you want to add color, mix a concrete dye into your water before adding the dry mix. This ensures the color is distributed evenly for a consistent finish.
Essential Application Tools and Safety Gear
You don’t need a professional workshop, but a few key tools are non-negotiable. You’ll want a sturdy mixing bucket, a drill with a paddle mixer attachment for a lump-free consistency, a steel trowel for application, and a concrete finishing broom for that non-slip texture. Don’t forget your safety gear. Concrete mix can kick up a lot of dust, so a respirator or dust mask is a must. You’ll also want heavy-duty gloves to protect your hands and safety glasses to shield your eyes. Having sponges and a bucket of clean water nearby will also make cleanup much easier.
Product Picks for Different Concrete Conditions
The state of your current concrete will guide your product choices. For significant damage like large holes or deep spalling, use a high-strength epoxy-based concrete patch for your initial repairs. Once your surface is smooth, you can think about the final look. Some resurfacers are purely functional, while others offer decorative finishes. You can find stampable overlays that create textures mimicking stone or brick, giving you a high-end look similar to stone veneer. After your new surface has cured, applying a quality concrete sealer is the final step to protect it from moisture and weather as part of a complete resurfacing project.
A Step-by-Step Guide to Resurfacing Your Porch
You’ve done the prep work, and your concrete is clean, patched, and ready for its makeover. This is where the transformation really happens. Applying the resurfacer isn’t complicated, but it does require a bit of finesse and a steady hand. The key is to work methodically and efficiently, since the compound starts to set pretty quickly. Think of it like frosting a cake: you want a smooth, even layer without overworking it. We’ll walk through mixing the compound to the right consistency, applying it smoothly, adding a professional-looking texture, and making sure it cures correctly for a finish that lasts. Following these steps will help you achieve a beautiful, durable surface that completely revitalizes your porch and steps. If you’re feeling unsure at any point, remember that professional resurfacing is always an option to guarantee a perfect result.
Mix the Compound Like a Pro
Getting the mix right is the foundation of a great finish. Start by reading the instructions on your resurfacing product, as ratios can vary. Generally, for a standard box of resurfacer, you’ll add the powder to a specific amount of water. If you want to add a tint, mix the concrete dye into the water before adding the powder. Use a drill with a mixer attachment to blend everything for a few minutes. You’re aiming for a smooth, lump-free consistency that’s similar to thick pancake batter. This ensures the compound will spread evenly without being too runny or too stiff to work with.
Apply an Even, Smooth Coat
Now it’s time to apply your perfectly mixed compound. Pour a manageable amount onto the damp concrete and start spreading it with a long-handled squeegee for large areas or a steel trowel for steps and edges. Your goal is to apply a thin, even layer. Be careful not to go thicker than about 1/8 of an inch, as a heavy coat can lead to cracking and adhesion problems down the line. Work from one end to the other, maintaining a wet edge to avoid lap marks. A smooth, consistent motion is your best friend here for achieving that flawless, professional look.
Add Texture for a Custom Finish
A textured finish isn’t just for looks; it’s a crucial safety feature that provides a non-slip surface, especially when the porch is wet. Before the resurfacer has a chance to fully set, you’ll want to create this texture. The easiest way to do this is by gently dragging a concrete finishing broom across the wet surface in one continuous direction. This simple step creates fine grooves that give the porch a clean, uniform appearance while adding the grip you need. It’s a small detail that makes a huge difference in both the function and final aesthetic of your project.
Understand the Curing Process
The final step is letting the concrete cure properly, which is essential for its strength and longevity. Resurfacing compounds harden quickly, so you need to work fast once you’ve mixed them. Misting the concrete with a bit of water right before you apply the compound helps slow down the initial drying and ensures a stronger bond. After you’ve applied and textured the surface, follow the product’s instructions for curing time. This usually involves keeping it free from foot traffic for at least 24 hours and allowing it to fully cure for several days before it can handle heavy use.
Common DIY Challenges (And When to Call for Help)
Taking on a concrete resurfacing project yourself can be incredibly rewarding, but it’s not without its hurdles. Even with the best intentions, a few common challenges can trip up the most dedicated DIYer. Understanding these potential issues ahead of time helps you prepare for a successful project and recognize when it might be smarter to pass the trowel to a professional.
From racing against the clock as the resurfacer sets to dealing with unpredictable New Jersey weather, timing is everything. You also need a keen eye to avoid common application mistakes that can compromise the final look and durability of your porch. Finally, knowing how to properly seal and maintain your new surface is key to its longevity. Let’s walk through these challenges so you can decide if this is a project you’re ready to tackle.
Beating the Clock and Weather
Once you mix your concrete resurfacing compound, the clock starts ticking. Most products begin to set in as little as 10 to 15 minutes, which means you have a very small window to apply and finish the material. This can be stressful, especially if you’re working on a large area or trying to achieve a specific texture. Weather is another major factor. Applying resurfacer in direct sunlight can cause it to dry too quickly, leading to cracks. On the other hand, high humidity or cool temperatures can slow the curing process. Professionals have the experience to adjust their techniques for different weather conditions, ensuring a consistent and durable finish every time.
Avoiding Common Application Mistakes
A few simple mistakes can undo all your hard prep work. First, you absolutely must remove any old paint or coatings from the concrete. If you apply resurfacer over flaking paint, it won’t bond properly and will eventually peel away. Another common error is applying the product too thick; aim for a layer no more than 1/8 of an inch. A thick coat is more likely to crack and won’t cure correctly. It’s also important to be realistic about what resurfacing can fix. It’s perfect for hairline cracks and minor spalling, but it’s not a solution for major structural problems. If you have large, deep cracks, you may need more extensive masonry repairs.
How to Seal and Maintain Your New Surface
After your new concrete surface has fully cured, the final step is to apply a good sealer. This is not a step you want to skip. A quality sealer protects your porch and steps from moisture, stains, and daily wear and tear. Many homeowners choose a “wet look” sealer, which enhances the color of the concrete and gives it a polished, finished appearance. Application is usually straightforward: you can roll or spray it on, following the manufacturer’s instructions. You’ll likely need to reapply the sealer every few years to keep your porch looking its best. Regular sweeping and cleaning will also go a long way in maintaining your beautiful new surface.
Signs It’s Time to Call in the Experts
While resurfacing can work wonders on tired concrete, it has its limits. If your porch or steps have large, gaping cracks, are crumbling at the edges, or show signs of sinking, resurfacing is likely not the right fix. These are usually signs of deeper structural issues that a thin overlay won’t solve. Trying to patch severe damage yourself can be a waste of time and money. If you’re unsure about the extent of the damage or feel overwhelmed by the process, it’s always best to get a professional opinion. An expert can properly assess the condition of your concrete and recommend the best solution, whether it’s resurfacing, repair, or replacement.
Related Articles
Frequently Asked Questions
How long does a resurfaced porch typically last? A professionally applied resurfacing job can last for 10 years or even longer. The key factors are thorough prep work and proper sealing. If the underlying concrete is solid and you keep up with resealing it every few years, you can expect a very durable, long-lasting finish that stands up to foot traffic and weather.
Can I change the color of my porch with resurfacing? Absolutely. This is one of the best parts of resurfacing. You can add a liquid or powder concrete dye directly to your mixing water before adding the resurfacer powder. This tints the entire mixture, giving you a consistent, integrated color that won’t chip or fade like paint. It’s a great way to customize the look to match your home’s exterior.
What if my porch only has a few small cracks? Do I need to resurface the whole thing? While you can just patch individual cracks, resurfacing the entire porch provides a much more uniform and professional look. Patching alone can leave discolored spots that stand out. Applying a thin overlay to the whole surface covers those repairs and any other minor imperfections, giving you a clean, consistent finish that looks brand new.
Is this a project I can realistically finish in one weekend? It’s possible, but it depends on the weather and the condition of your porch. The prep work, like stripping old paint and power washing, can take a full day. Then, the concrete needs to dry completely, which could take another 24 hours. The actual application is quick, but the surface needs at least another day to cure before you can walk on it. It’s best to plan for a long weekend to avoid rushing any steps.
My steps are crumbling a little at the edges. Is resurfacing enough to fix that? Resurfacing is designed to cover cosmetic flaws on a structurally sound surface, not to rebuild it. If your steps are actively crumbling or have deep, unstable cracks, a thin resurfacing layer won’t solve the underlying problem. In this case, you likely need a more substantial masonry repair to ensure the steps are safe and stable before considering any cosmetic finish.